
Picture this: You peek into your chicken coop one morning and find your favorite hen, Beatrice, sitting in the corner looking thoroughly miserable. The coop feels stuffy, there’s barely room to move, and half your flock is huddled together looking like they’re plotting an escape. Sound familiar? Welcome to the not-so-exclusive club of chicken keepers who’ve discovered that a cramped, poorly designed coop can turn even the sweetest birds into stressed, unhappy creatures.
Here’s what I’ve learned after years of trial and error (and yes, a few coop design disasters): the inside of your chicken coop matters just as much as the outside. A well-thought-out interior can be the difference between hens that barely lay and a flock that greets you with enthusiasm every morning.
Your chickens need at least 2-3 square feet of floor space per bird inside the coop, plus 4-5 square feet in their outdoor run – think of it as their bedroom versus their living room. But space is just the beginning. Without proper ventilation, you’ll end up with ammonia buildup that’ll have your birds wheezing faster than you can say “chicken soup.” Trust me, I learned this the hard way during my first winter when my poorly ventilated coop turned into a poultry sauna.
Then there’s the whole nesting box situation. You’ll need one box for every 4-5 hens, though I guarantee they’ll all fight over the same “premium” spot anyway (chickens have opinions about real estate too). Don’t forget about headspace – your birds need at least 30 inches to roost comfortably, unless you enjoy watching them do the chicken equivalent of hunching over all night.
After designing and redesigning my coop more times than I care to admit, I’ve figured out what actually works. From choosing flooring that keeps digging predators at bay to creating those all-important dust bathing areas (yes, chickens need spa time too), every detail matters.
Ready to transform your coop from chicken prison to poultry paradise? Let’s walk through everything you need to create an interior where your hens will be safe, comfortable, and ready to reward you with plenty of fresh eggs.
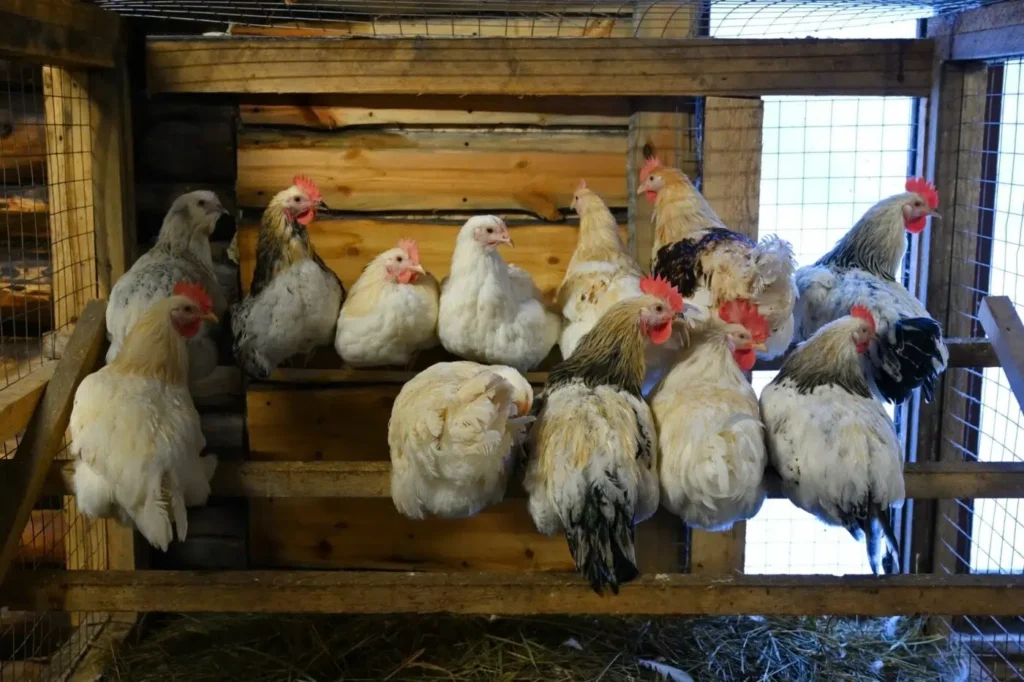
Plan the Layout and Space Requirements
Image Source: Redeem Your Ground
Let’s talk about chicken math – and no, I don’t mean the mysterious way three chickens somehow become twelve. I’m talking about the actual square footage your birds need to stay happy and healthy. Getting this wrong is like trying to raise teenagers in a closet – nobody’s going to be pleased with the arrangement.
After designing coops for both my tiny Silkie bantams and my behemoth Buff Orpingtons, I’ve learned that one size definitely doesn’t fit all. The space requirements for your flock depend on several factors, and getting them right from the start saves you from expensive do-overs later (trust me on this one).
How much space do chickens need?
Here’s where things get interesting. The amount of space your chickens need varies dramatically based on breed size and whether they’re living the free-range dream or spending their days in confinement.
For standard-sized chickens, I recommend at least 4 square feet of coop space per bird if they have access to an outdoor run. But if your chickens will be confined full-time (maybe you live in an urban area or have persistent predator problems), they’ll need considerably more breathing room – about 10 square feet per bird.
Breed size makes a huge difference in your space calculations:
- Standard breeds: 4 square feet of coop space per bird; 8 square feet of run space
- Heavy breeds: 8 square feet of coop space per bird; 15 square feet of run space
- Bantam breeds: 2 square feet of coop space per bird; 5 square feet of run space
Don’t forget about roosting space – standard breeds need about 8 inches of perch space per bird, while those chunky heritage breeds need a full 12 inches. For nesting boxes, plan on one box for every 4-5 hens (though they’ll probably all want to use the same one anyway).
Overcrowding creates a domino effect of problems: stress, aggressive behavior, feather pulling, and increased disease risk. I learned this lesson the expensive way when I tried to squeeze too many birds into my first coop. Give them adequate space, and you’ll have a stable pecking order and genuinely content birds.
Indoor vs. outdoor space considerations
Think of your coop setup like a house – the indoor space is the bedroom, while the outdoor run is the living room. Your chickens will spend most of their waking hours outside when weather permits, so both areas need thoughtful planning.
For the run, 8-10 square feet per bird is the absolute minimum, but more is always better. My birds spend probably 90% of their daylight hours outside when given the choice. A properly sized run gives them room for all their natural behaviors – foraging, dust bathing, and that hilarious chicken version of tag they seem to play.
Your outdoor run works best when it’s:
- Located in a well-drained area (nobody likes muddy chicken feet tracking through the house)
- Covered to protect from predators and weather
- Enriched with perches, ramps, and tunnels to utilize vertical space
The indoor coop serves specific purposes: nighttime roosting, egg-laying, and shelter during storms or extreme weather. This is where proper ventilation becomes crucial – you need fresh air circulation without creating drafts that’ll chill your roosting birds.
If you’re lucky enough to let your chickens free-range, you can get by with slightly less coop space – about 3 square feet per bird. The key is balancing coop size with how much time your birds will actually spend confined indoors.
Here’s a quick reference for common flock sizes:
- 6 chickens: 24 sq. ft. coop, 48 sq. ft. minimum run
- 10 chickens: 40 sq. ft. coop, 80 sq. ft. minimum run
- 20 chickens: 80 sq. ft. coop, 160 sq. ft. minimum run
Planning for future flock expansion
“Chicken math is real,” as experienced chicken keepers often say – and boy, is it ever. What starts as “just a few chickens for fresh eggs” has a funny way of multiplying. My husband stopped asking about new additions after bird number fifteen.
When planning your coop interior, think bigger than your current needs:
- Build larger than your initial flock size to accommodate future additions
- Create a layout that allows for potential expansions or modifications
- Install features that can scale with flock size (like modular nesting boxes)
A coop that’s too small for your growing flock forces you into expensive rebuilds or awkward additions. I’ve seen chicken keepers try to add onto cramped coops, and it rarely ends well. Build it right the first time, with room to grow.
Consider the largest breeds you might eventually want to raise. This gives you flexibility if you decide to add some majestic Jersey Giants to your flock of Leghorns later on.
Even if local regulations limit your chicken numbers, providing extra space improves your current flock’s health and happiness. That initial investment in a slightly larger structure pays dividends through fewer health problems and better egg production.
Remember, your chickens use the coop primarily for sleeping, laying, and weather shelter. The real living happens in the run or free-range areas. Balance these spaces thoughtfully, plan for growth, and you’ll create a coop interior that keeps your birds thriving for years to come.
Choose the Right Flooring and Wall Materials
Here’s the thing about chicken coop floors – get this wrong, and you’ll either be cleaning constantly or dealing with sick birds. After trying just about every flooring option (including one disastrous experiment with outdoor carpet that I don’t recommend), I’ve learned what actually works in the real world of chicken keeping.
Wood, concrete, or dirt floors
The great flooring debate! Each option has die-hard fans, and honestly, they all have their place depending on your situation and tolerance for maintenance.
Concrete floors are the Fort Knox of chicken coop flooring. Nothing’s digging through that – not rats, snakes, or that particularly determined raccoon that figured out how to open your feeder. Cleaning is a dream – just sweep and hose it down. But here’s the catch: concrete is cold (think standing on a frozen lake in winter) and once it’s down, you’re committed. If you go this route, add a slight slope toward the door for easier cleaning.
Wooden floors hit the sweet spot for many chicken keepers. They’re warmer under those feathered feet, easier on your knees when you’re crawling around inside, and won’t break the bank. I’m partial to plywood floors myself – they’re smooth, affordable, and keep the diggers out. Pro tip: Paint them with several coats of floor paint unless you enjoy replacing rotted boards every few years.
Dirt floors are as natural as it gets and cost exactly nothing. Your chickens will love scratching in real earth, and you’ll love not having to build a floor. The downside? Zero predator protection and you’ll be dealing with mud every time it rains. These work great for portable coops that get moved regularly.
Moisture control and insulation
Moisture is the silent enemy of chicken coops. I learned this lesson during my second winter when my poorly ventilated coop turned into a respiratory nightmare for my poor birds.
For insulation, you can use 1.5″ styrofoam sheets between your walls and siding. But here’s what nobody tells you – over-insulating without proper ventilation can actually create more problems than it solves. Think of it like wearing a winter coat in a sauna.
Keep moisture under control with these tried-and-true methods:
- Keep bedding bone dry (wet bedding = ammonia factory)
- Fix leaks immediately (water and wood don’t play well together)
- Use nipple waterers or elevated containers to prevent spills
- Install cross-ventilation with windows on opposite walls
Wet bedding doesn’t just smell awful – it becomes a disease breeding ground and releases ammonia that’ll burn your chickens’ respiratory systems. A well-ventilated coop with a raised floor beats a damp, dark cave every time.
Easy-to-clean surfaces
Your future self will thank you for choosing surfaces that clean easily. Trust me on this one.
For wooden floors, consider these protective options:
- Rubberized roof coating creates a tough, waterproof surface
- Linoleum or vinyl flooring (just make sure it’s covered with bedding so your girls don’t try to eat it)
- Rubber mats offer cushioning and easy cleanup
No matter what floor you choose, good bedding makes all the difference. Stick with untreated wood shavings, sawdust, or chopped straw. Deep bedding (4-6 inches) acts like a sponge for droppings and provides insulation.
Want to make your life easier? Install a removable droppings tray under your roosting bars. Simply slide it out, dump it in your compost, and slide it back in. This lets you spot-clean the messiest area frequently while doing a full cleanout just once or twice a year.
Remember: the easier your coop is to clean, the more likely you’ll actually keep it clean. And clean coops mean healthy, happy chickens.
Install Essential Interior Features

Image Source: The Hen House Collection
Now comes the fun part – turning your empty coop shell into a five-star chicken hotel. After installing and reinstalling more nesting boxes than I care to count (and learning that chickens are surprisingly picky about their accommodations), I’ve figured out what actually makes these feathered critics happy.
The right interior features don’t just make your chickens comfortable – they determine whether you’ll have a productive flock or a bunch of stressed birds giving you the stink eye every morning. Let me walk you through the essential elements that’ll transform your basic structure into chicken paradise.
Nesting boxes and placement tips
Here’s something that’ll make you chuckle: no matter how many nesting boxes you install, your hens will inevitably decide that one particular box is the “penthouse suite,” and they’ll all wait in line to use it while perfectly good boxes sit empty. I’ve watched three hens literally queue up for their favorite box while two identical ones stayed vacant. Chickens have strong opinions about real estate!
Despite this quirky behavior, you still need one nesting box for every 4-5 hens, with a minimum of two boxes regardless of flock size. Trust me on this – that backup box becomes essential when you have multiple broody hens or during peak laying season.
Size matters when it comes to nesting boxes. Standard breeds need about 14″x14″ boxes, while smaller breeds can make do with 12″x12″ spaces. I learned this the hard way when my Buff Orpington, Brunhilde, got stuck trying to squeeze into a bantam-sized box I’d repurposed. Not my finest chicken-keeping moment.
Placement is where things get interesting. Keep boxes inside the coop in darker, quieter areas, but make sure you can access them from outside for easy egg collection. There’s nothing worse than having to crawl through the coop every morning while dodging territorial hens.
Height is crucial – mount boxes about 18 inches off the floor. This keeps them accessible but discourages your birds from using them as roosting spots (because nobody wants poop-covered eggs). Always keep nesting boxes lower than roosting bars to maintain the pecking order.
For bedding, I swear by straw or wood shavings in the nesting boxes. Some folks add herbs to the mix, claiming it repels pests and boosts egg production. Can’t hurt, right?
Roosting bars and poop boards
Roosting bars are where your chickens will spend roughly half their lives, so getting them right matters. I’ve seen people use everything from old broomsticks to PVC pipe, but wood is the gold standard. Never use metal (it conducts cold) or plastic pipe (slippery as ice when wet).
The secret weapon? A 2×4 board with the 4-inch side facing up. This gives your chickens a flat surface to sleep on, letting them cover their feet with their bodies during cold nights. It’s like the difference between sleeping on a tightrope and sleeping on a comfortable bed.
Position roosting bars 12-18 inches off the ground – high enough to make chickens feel secure, but low enough to prevent injuries when they hop down. Give each bird 8 inches of roosting space, or 10 inches for those chunky heritage breeds.
Here’s where poop boards become your best friend. Install a board directly under the roosting bars to catch overnight droppings. I use plywood covered with cheap vinyl flooring – makes cleanup a breeze. Every morning, I scrape the droppings into a bucket with a paint scraper. Takes two minutes and keeps the coop fresh while giving me a daily health check on my flock.
Feeders and waterers setup
The great feeder debate: inside or outside the coop? After years of experimenting, I’m firmly in the “outside” camp for most situations. Keeping feeders and waterers in the run reduces mess inside the sleeping area and encourages your chickens to spend more time outdoors.
You’ve got several options for feeders:
- Trough feeders for multiple birds eating together
- Hanging bell feeders that prevent spillage
- Automatic treadle feeders that keep out pests and rain
For water, consider:
- Bell-shaped drinkers that stay cleaner
- Nipple systems that reduce waste and contamination
The key is elevation – raise everything off the ground to prevent contamination while keeping it at a comfortable height for all your birds. If you do keep food and water inside (like when chickens are locked up until late morning), place them strategically to minimize mess. Otherwise, outside placement keeps your coop cleaner and your chickens happier.
Remember, these aren’t just functional necessities – they’re the furniture that’ll determine whether your chickens consider their coop home sweet home or just a place they’re forced to sleep.
Ensure Proper Ventilation and Lighting

Image Source: Colin Purrington’s blog
Here’s something I learned the hard way during my second winter of chicken keeping: you can have the most beautiful coop in the neighborhood, but if the air inside feels like a musty gym sock, your chickens are going to suffer. I walked into my coop one January morning to find my girls wheezing and my eyes watering from ammonia fumes. That’s when I discovered that proper ventilation isn’t just nice to have – it’s absolutely essential.
Why airflow matters (and what happens when you get it wrong)
Think of your chicken coop like a tiny house with some very messy roommates. Chickens are basically little moisture factories – they breathe out water vapor, their droppings release humidity, and without proper airflow, you end up with a swamp that would make a Louisiana bayou jealous. That excess moisture doesn’t just make things uncomfortable; it creates the perfect conditions for frostbite when temperatures drop.
But here’s the real kicker: chickens produce ammonia through their droppings, and since ammonia rises (it’s lighter than air), those harmful fumes concentrate right at roosting level if you don’t have high vents to let them escape. Your chickens’ respiratory systems are incredibly sensitive – they can be damaged by ammonia levels so low you can’t even smell them yet.
I’ve found that the magic number for warm climates is about 1 square foot of ventilation for every 10 square feet of coop floor space. Less than that, and you’re playing with fire. More importantly, though, it’s about placement – you want that air moving through, not just sitting there.
Natural vs. artificial lighting (and the egg production game)
Your hens need about 14-16 hours of light daily to keep those eggs coming. When winter’s short days hit, egg production naturally drops unless you give them a helping hand with supplemental lighting.
Natural light through well-placed windows is your best friend:
- Gets your chickens moving and behaving naturally
- Provides some warming solar gain during winter
- Costs you absolutely nothing to operate
For artificial lighting, I’ve had good luck with LED lights – they’re energy efficient and effectively stimulate egg production by triggering the pituitary gland. Just make sure they’re positioned where curious beaks can’t reach them and protected from all that coop dust.
Red lights are a different story entirely. They won’t boost egg production, but they’re fantastic for keeping birds calm. Here’s why: chickens don’t perceive red light as actual daylight, so you can use red bulbs for nighttime coop checks without disrupting their sleep cycles.
Avoiding drafts while keeping air fresh
This is where a lot of chicken keepers mess up (myself included, initially). There’s a huge difference between beneficial ventilation and harmful drafts. Drafts are cold air flowing directly across your roosting chickens – think of it like sleeping with a fan blowing on you in winter. Not fun.
The secret is positioning. Keep your year-round ventilation high above where your chickens roost. During winter, all vents should be well above your birds’ highest roosting spots and protected from snow blowing in.
Cross-ventilation is your friend – install vents on opposite walls or between different heights in the coop. This creates natural pressure differences that keep air moving through the structure without creating uncomfortable drafts.
Here’s my winter strategy: close any vents at or below chicken level while keeping the higher ones open. Come summer, you can open everything up – those drafts actually help chickens stay cool when it’s hot.
One last thing: always cover ventilation openings with hardware cloth or wire screening. Proper ventilation shouldn’t come at the cost of security. You want fresh air, not uninvited dinner guests.
Add Comfort and Enrichment Elements
Here’s something I discovered after watching my chickens for a few years: they’re basically feathered divas with very specific ideas about luxury. Give them just the basics, and they’ll survive. But add some comfort elements, and suddenly you’ve got a flock that acts like they’re living in a five-star resort.
These enrichment additions aren’t just nice-to-haves – they’re what transform a basic chicken shelter into a place where your birds can actually be chickens. We’re talking about encouraging all those natural behaviors that make chickens happy, healthy, and entertaining to watch.
Dust bathing areas
If you’ve never watched a chicken take a dust bath, you’re missing out on one of nature’s most amusing spa treatments. My girls go absolutely wild for their dust baths – rolling around like they’re auditioning for a chicken commercial, kicking dirt everywhere, and emerging looking like they’ve been dipped in powdered sugar.
Dust bathing isn’t just chicken entertainment (though it’s hilarious to watch). It’s how chickens naturally clean themselves and deal with parasites by literally suffocating the little freeloaders. Think of it as their version of a dry shampoo and pest control treatment rolled into one.
Setting up a proper dust bath area is surprisingly simple. Keep it away from food and water stations – nobody wants gritty feed. Create a contained space using whatever you have on hand: rocks, boards, or logs work perfectly as borders. Fill it with clean, dry dirt or construction-grade sand.
Pro tip from someone who learned the hard way: set up multiple dust bath spots around your coop area. Sunny locations for chilly days, shaded spots for when it’s blazing hot. My hens have definite preferences about their bathing conditions – apparently, they’re pickier than I am about my own bath time.
Bedding materials and depth
Choosing the right bedding is like picking the perfect mattress – it affects everything from comfort to health. Your chickens will spend a good chunk of their lives walking, sitting, and sleeping on whatever you choose, so it’s worth getting this right.
The ideal bedding should soak up moisture like a sponge, stay loose instead of clumping into nasty mats, won’t poison anybody if nibbled, and resists turning into a moldy mess. Here’s what I’ve tried and what actually works:
Hemp bedding is the Rolls Royce of chicken bedding – super absorbent, controls odors like nobody’s business, and composts beautifully when you’re done with it. It’s pricier, but worth every penny if your budget allows.
Wood shavings are my go-to for most situations. They’re affordable, provide decent insulation, and last about four months before needing replacement. Just make sure they’re not treated with anything sketchy.
Straw looks rustic and provides good insulation, but it can be a pain if it gets wet and starts matting down or growing mold. If you go this route, plan on turning it regularly like you’re making a giant chicken salad.
When it comes to depth, don’t be stingy. Start with 4-6 inches of bedding, though you can go up to 12 inches if you’re doing the deep litter method. This deeper approach lets the bedding absorb droppings while still allowing air to circulate. It’s like creating a natural composting system right in your coop.
Using diatomaceous earth safely
Food-grade diatomaceous earth (DE) is one of those things that sounds too good to be true but actually works. It’s basically fossilized algae that’s been ground into a powder, and it works by damaging the protective coating on parasites, causing them to dry out.
The key word here is “sparingly.” Sprinkle it lightly in dust bath areas and nesting boxes – a little goes a long way. Too much creates a cloud of dust that’ll irritate everyone’s lungs, including yours. Always wear a dust mask when applying it, and do it when your chickens are outside enjoying their run time.
Here’s the thing nobody tells you about DE: it doesn’t discriminate between good bugs and bad bugs. It’ll kill beneficial insects just as happily as it kills mites and lice. Use it strategically – a light dusting in coop corners, nesting boxes, and under roosts, then cover it with bedding so it’s not floating around in the air.
Remember, creating a comfortable environment isn’t just about spoiling your chickens (though they’ll certainly act spoiled). It’s about giving them the tools they need to stay healthy and happy naturally.
Include Storage and Maintenance Access
Here’s something I wish someone had told me when I built my first coop: the fancy nesting boxes and perfect roosts don’t mean much if you can’t easily maintain them or store your supplies properly. After years of crawling into coops on my hands and knees (not fun when you’re wearing your good jeans) and dealing with feed that turned into expensive mouse buffets, I’ve learned that smart storage and easy access make the difference between loving your chicken-keeping routine and dreading it.
Feed and tool storage ideas
Nothing ruins your day quite like discovering that rats have turned your $30 bag of layer feed into a rodent rave. I learned this lesson the hard way when I stored feed in those flimsy plastic containers – big mistake. Raccoons can pop those lids off like they’re opening a can of soda, and rats can chew through plastic faster than you can say “expensive bird food.”
Here’s what actually works:
Galvanized metal garbage cans are your best friend for feed storage. They’re rodent-proof, moisture-resistant, and last forever. I’ve had the same two cans for five years now, and they still look great despite being through multiple seasons of weather.
Elevated storage saves you from dealing with rust and makes everything easier to access. Place your containers on bricks, cinderblocks, or pressure-treated lumber – just get them off the ground. Trust me, your back will thank you when you’re not bending down to ground level every time you need feed.
Keep your storage close to the coop but not inside it. I made the mistake of storing feed inside my first coop, which attracted every mouse in the neighborhood. Now I keep everything in a simple shelf setup right outside – two ten-gallon galvanized bins with a countertop that doubles as an egg-sorting station.
Designing for easy cleaning
The cleanest coop is the one that’s easy to clean. Sounds obvious, right? But you’d be amazed how many people (myself included, initially) design beautiful coops that are absolute torture to maintain.
Removable dropping trays under your roosts are game-changers. I clean mine quarterly and do a full coop cleanout just once a year. The key is positioning them where you can actually reach them without dislocating your shoulder.
For floors, I’ve found that raised coops make everything easier. You can actually get underneath them to clean, and waste removal becomes a simple scraping motion rather than an archaeological excavation project.
If you’re going with a wooden floor, consider adding linoleum over concrete – it prevents rodents from chewing through while giving you a surface you can actually hose down when needed.
Access doors and walk-in options
This might be the most important advice in this entire article: build your coop so you can walk into it comfortably. I spent three years crawling around like I was exploring caves, and it was miserable. The day I rebuilt with a full-height door was the day chicken keeping went from chore to pleasure.
Dutch doors are brilliant if you have the space – you can open the top for ventilation while keeping the bottom closed to contain your birds. Plus, there’s something satisfying about leaning on a Dutch door while watching your flock (makes you feel like a proper farmer).
For egg collection, exterior-mounted nesting boxes with outside access are worth their weight in gold. No more disturbing broody hens or stepping through the coop just to grab eggs for breakfast.
Don’t forget about locking mechanisms that you can operate with one hand – because you’ll always be carrying something when you need to open that door. And make sure they’re raccoon-resistant, because those little bandits are surprisingly good with their paws.
The truth is, maintenance features might not be as exciting as picking out cute nesting box curtains, but they’ll have the biggest impact on whether you actually enjoy keeping chickens or just endure it.
Conclusion
After walking through all these coop interior essentials, you might be feeling a bit overwhelmed – trust me, I’ve been there! When I first started planning my coop interior, I made a list so long it looked like I was designing a chicken mansion (which, let’s be honest, our feathered friends probably deserve).
But here’s the thing I’ve learned after years of tweaking, adjusting, and occasionally starting over: you don’t need to get everything perfect on day one. What matters most is creating a space where your chickens can be healthy, comfortable, and happy to see you each morning.
The beauty of a well-designed coop interior isn’t just in the technical details – though proper ventilation will save you from that ammonia eye-watering experience, and adequate space prevents the poultry drama that comes with overcrowding. It’s in those everyday moments when you open the coop door and your hens come running (well, waddling quickly) to greet you, when you find a perfect egg in a clean nesting box, or when you watch your birds dust bathing contentedly in their designated spa area.
I’ve found that chickens are surprisingly forgiving creatures. They’ll adapt to less-than-perfect conditions, but why make them? When you take the time to design a thoughtful interior, you’re not just building a chicken coop – you’re creating a foundation for years of successful chicken keeping.
Remember, every chicken keeper’s situation is different. Maybe you’re working with a tiny urban space or converting an existing structure. Perhaps you’re starting with just three hens or planning for a flock of twenty. The principles remain the same: give them space, keep them clean and dry, provide good airflow, and don’t forget those creature comforts that make a house a home.
Your chickens will reward thoughtful design with better health, more eggs, and fewer middle-of-the-night worries about whether something’s wrong in the coop. And honestly? There’s something deeply satisfying about knowing you’ve created a little piece of poultry paradise in your own backyard.
Now go forth and build that dream coop interior – your future feathered friends are counting on you!
FAQs
Q1. How much space do chickens need inside a coop? Chickens typically need 3-4 square feet of coop space per bird if they have outdoor access. For full-time confinement, aim for 8-10 square feet per chicken. Provide 8-12 inches of roosting space per bird and one nesting box for every 4-5 hens.
Q2. What are the best flooring options for a chicken coop? Popular flooring choices include concrete for durability and predator protection, wood for insulation and comfort, and dirt for economy. Concrete is easiest to clean but can be cold, while wood needs protection against moisture. Whichever you choose, use appropriate bedding material for comfort and hygiene.
Q3. How do I ensure proper ventilation in my chicken coop? Install vents high above roosting areas to allow ammonia and moisture to escape without creating drafts. Aim for cross-ventilation by placing vents on opposite walls. In winter, keep lower vents closed but maintain some airflow through higher openings. Proper ventilation is crucial for preventing respiratory issues and regulating coop temperature.
Q4. What lighting should I provide in a chicken coop? Chickens need about 14-16 hours of light daily for optimal egg production. Natural light through windows is ideal, but you can supplement with artificial lighting during shorter winter days. LED lights are energy-efficient and effective. Consider using red lighting at night to allow movement without disrupting sleep cycles.
Q5. How can I make coop maintenance easier? Design your coop with easy access in mind. Install removable dropping trays under roosts for quick cleaning. Use smooth, washable surfaces where possible. Include storage for feed and tools near the coop. A walk-in design with full-height doors makes all tasks more comfortable. Regular, easy maintenance leads to a healthier flock and a more pleasant chicken-keeping experience.