
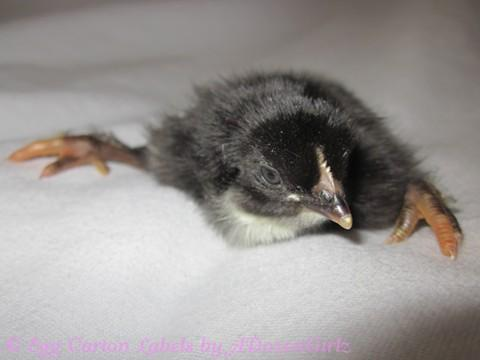
Nothing quite breaks a chicken keeper’s heart like watching a newly hatched chick struggle to stand because its little legs won’t cooperate. Splayed legs in chicks (also called spraddle leg) affects up to 2-3% of newly hatched chicks, but the good news is that over 90% can be completely cured when treated within the first 48 hours. This condition, where one or both legs extend sideways instead of supporting the chick underneath, looks devastating but responds remarkably well to simple treatment methods that any poultry farmer can master.
The key to success lies in immediate recognition and action. I’ve personally treated dozens of affected chicks over my years of raising poultry, and the transformation from a helpless, scooting chick to a normally walking bird in just 3-4 days never gets old. While splayed legs in chicks can seem overwhelming for first-time chicken keepers, understanding what causes this condition and how to treat it quickly turns a potential tragedy into a manageable situation that strengthens your skills as a poultry caretaker.
Table of Contents
- What Exactly Are Splayed Legs?
- Why Splayed Legs Happen to Chicks
- Step-by-Step Treatment Methods That Actually Work
- Essential Supplies and Where to Get Them
- Prevention Strategies That Save Heartache
- Recovery Timeline and What to Expect
- When Professional Help is Needed
- Common Mistakes That Sabotage Treatment
- FAQs
What Exactly Are Splayed Legs?
Splayed legs in chicks is a musculoskeletal condition where one or both legs extend laterally (sideways) from the body instead of being positioned underneath to provide proper support. Think of it like a chick doing an involuntary split – the legs remain fully functional and can move through their full range of motion, but the supporting tendons and muscles lack the strength to keep the legs in the correct position under the chick’s body.
The condition affects the hip and leg musculature development, creating a weakness in the tendons of the feet and legs. Unlike bone deformities or paralysis, the chick retains full sensation and movement in the affected limbs. The critical difference is that splayed legs represent a developmental timing issue rather than permanent structural damage – which is exactly why early treatment works so well.
Veterinary sources identify this as primarily a tendon strength issue during the critical first days of life when chicks are rapidly developing the muscle strength needed to support their body weight. The anatomical vulnerability occurs because newly hatched chicks have immature musculature that must quickly strengthen to support their rapidly growing bodies.
Why Splayed Legs Happen to Chicks
Understanding the root causes of splayed legs in chicks helps prevent future occurrences and explains why certain treatment methods work effectively. The most common cause is slippery brooder surfaces that prevent chicks from gaining proper footing during their critical first 72 hours of life.
Environmental Causes (Most Common)
Slippery flooring surfaces account for the majority of splayed leg cases. Newspaper, cardboard, plastic, or any smooth surface prevents chicks from developing proper grip and muscle strength. When chicks can’t gain traction, their legs slide outward, and the abnormal positioning prevents normal muscle development from occurring.
Incubation-Related Factors
Temperature fluctuations during incubation significantly increase splayed leg occurrence. Inconsistent incubator temperatures, particularly temperatures running too high or varying significantly during the 21-day incubation period, affect proper muscle and tendon development in the developing chick.
Humidity problems during incubation, especially insufficient humidity or excessive humidity variations, create “dry stick” conditions that make chicks more vulnerable to leg problems during hatching. Poor egg positioning and prolonged hatching processes also contribute to increased splayed leg rates.
Nutritional Deficiencies
Breeder nutrition problems often manifest as splayed legs in their offspring. Deficiencies in manganese, choline, zinc, and B vitamins (especially riboflavin/B2) in the parent birds’ diet create developmental problems in the embryonic chicks that become apparent at hatching.
The most critical nutritional factor is feeding breeding stock layer feed instead of proper breeder feed. Layer feeds lack the essential nutrients needed for proper embryo development, significantly increasing the risk of skeletal and muscular problems in chicks.
Genetic and Management Factors
Some genetic lines show higher susceptibility to splayed legs, particularly in fast-growing broiler breeds where rapid growth can outpace skeletal development. Extended egg storage before incubation (beyond 10 days) reduces chick vitality and increases susceptibility to developmental problems.
Step-by-Step Treatment Methods That Actually Work
The golden rule for treating splayed legs in chicks is immediate action within the first 24-48 hours yields over 90% success rates. I’ve found that hesitation costs precious time during the narrow window when treatment is most effective.
The VetWrap Method (Most Effective)
Materials needed:
- VetWrap cohesive bandage (available on Amazon)
- Scissors
- Paper towels for brooder flooring
Step-by-step process:
- Assess the chick immediately – Identify the severity and determine if one or both legs are affected. The chick should be alert and attempting to move, even if unsuccessfully.
- Create the hobble strips – Cut VetWrap into ¼-inch wide strips, approximately 4 inches long. Critical point: Never stretch the VetWrap during cutting or application – this elastic material can cut off circulation.
- Position the chick properly – Gently hold the chick with its legs in the natural standing position, approximately the width of the chick’s body apart.
- Apply the hobbles – Wrap one end of the strip loosely around each lower leg (shank), leaving about 1 inch of connecting material between the legs. The hobble should allow slight movement but prevent the legs from splaying outward.
- Test immediately – Set the chick down to ensure it can stand and walk. The legs should remain in proper position while allowing normal movement.
- Monitor and replace daily – Remove and reapply hobbles every 24 hours maximum due to rapid chick growth.
The Band-Aid Method (DIY Alternative)
For immediate treatment when VetWrap isn’t available, standard adhesive bandages work effectively:
- Cut a band-aid lengthwise – This creates a narrow strip with adhesive ends and a padded center section.
- Position between legs – Place the padded section between the chick’s legs at the appropriate width.
- Secure gently – Wrap the adhesive portions around each leg, ensuring the tape doesn’t stick to skin or feathers directly.
- Check circulation frequently – Band-aids can tighten as they warm, so monitor every few hours for circulation problems.
Physical Therapy Enhancement
Combine hobbling with 6-8 brief physical therapy sessions daily, each lasting about one minute:
- Gently support the chick’s body while encouraging it to use its legs
- Allow the chick to practice standing on textured surfaces
- Gradually reduce assistance as leg strength improves
- Use shallow containers with paper towel padding to encourage pushing motions
Essential Supplies and Where to Get Them
Having the right materials ready makes the difference between successful treatment and missed opportunities. I recommend keeping a basic splayed leg treatment kit assembled before hatching season begins.
Professional Treatment Supplies
VetWrap Options:
- 12-pack Self-Adhesive Bandage Wrap (2″ x 5 yards) – $12-15
Commercial Chick Hobbles:
- Pre-made elastic hobbles with spacers – $8-15 for 50-100 pieces
Supportive Care Supplies
Nutritional Support:
- Nutri-Drench Poultry Supplement (4 oz) – $12-18
- Vitamin B complex for poultry – $8-15
- Electrolyte supplements for stressed chicks
Brooder Modifications:
- Rubber shelf liner for traction
- Shallow water dishes with marbles to prevent drowning
Cost-Effective DIY Alternatives
When professional supplies aren’t immediately available:
- Regular band-aids (cut lengthwise)
- Hair ties with plastic straw pieces as spacers
- Medical tape with gauze padding
- Fabric strips from old t-shirts (cotton works best)
The total cost for a complete treatment kit ranges from $25-50, but even a single roll of VetWrap ($5-8) can treat dozens of chicks effectively.
Prevention Strategies That Save Heartache
Preventing splayed legs in chicks is far easier than treating it, and implementing proper management practices virtually eliminates this condition from your flock.
Brooder Setup Excellence
The most critical prevention factor is proper brooder flooring from day one. Paper towels over any bedding provide essential grip for newly hatched chicks during their first 48-72 hours. Never use newspaper, cardboard, or plastic surfaces that create slippery conditions.
After the critical first few days, transition to large-flake pine shavings (avoid cedar shavings, which can be toxic). Maintain clean, dry bedding to prevent slippery conditions from developing. Provide at least 6 square inches per chick to prevent overcrowding and competition for stable footing.
Incubation Best Practices
Maintain consistent incubator temperature at 99.5°F (37.5°C) throughout the entire 21-day incubation period. Temperature fluctuations, particularly running too hot during incubation, significantly increase splayed leg occurrence. Install backup power systems and monitor temperature continuously.
Control humidity levels properly: 55-60% for the first 18 days, then 65-70% during the hatching period. Line incubator floors with non-slip surfaces (rubber shelf liner works well) before lockdown to provide traction for newly hatched chicks.
Nutritional Management
Feed breeding stock high-quality breeder feed rather than layer feed. Layer feeds lack essential nutrients needed for proper embryo development, particularly manganese, choline, zinc, and B vitamins critical for skeletal development.
Consider supplementing breeding birds with additional vitamins 2-3 days before collecting eggs for incubation. This ensures optimal nutrition during the critical early stages of embryo development.
Egg Handling and Storage
Don’t store hatching eggs longer than 10 days before setting them in the incubator. Older eggs show reduced hatch rates and increased chick defect rates, including splayed legs. Store eggs properly at 55-60°F with 75% humidity, turning them daily until incubation begins.
Recovery Timeline and What to Expect
Understanding the normal recovery progression helps maintain realistic expectations and identify when adjustments are needed. Most successfully treated chicks show significant improvement within 48-72 hours and complete recovery within one week.
Day-by-Day Recovery Process
Day 1: Initial hobble application and adjustment period. The chick learns to move with the support system and typically shows immediate improvement in standing ability.
Days 2-3: Gradual strengthening of leg muscles and tendons becomes apparent. The chick moves more confidently and may begin attempting to scratch and peck normally.
Days 4-5: Significant improvement is evident in most successful cases. The chick walks with increasing stability and coordination.
Days 6-7: Complete recovery in successful cases. The chick moves normally without any apparent limitations.
Success Indicators
Positive signs during treatment include:
- Improved standing ability within 24 hours
- Increased activity and alertness
- Normal eating and drinking behaviors
- Gradual increase in walking stability
- Legs remaining in correct position when hobbles are temporarily removed
Treatment Adjustments
Monitor daily and adjust hobbles as the chick grows. Replace hobbles every 24 hours maximum – rapid chick growth can cause properly fitted hobbles to become too tight quickly. Gradually increase the space between legs as improvement occurs, eventually removing hobbles entirely when the chick maintains proper leg position independently.
When Professional Help is Needed
While most cases of splayed legs in chicks respond well to home treatment, certain situations require veterinary consultation. Seek professional help when multiple chicks are affected, as this suggests systematic problems with incubation, nutrition, or management that need expert evaluation.
Immediate Veterinary Consultation Recommended
Contact a poultry veterinarian when:
- Severe cases where the chick cannot stand or move at all
- No improvement after 48-72 hours of proper treatment
- Signs of circulation problems from hobbles
- Concurrent health issues like lethargy, inability to eat/drink, or other deformities
- Uncertainty about proper diagnosis – some conditions mimic splayed legs but require different treatment
Professional Services Available
Veterinarians can provide:
- More precise splinting and monitoring techniques
- Nutritional assessment and supplementation recommendations
- Differential diagnosis to rule out other conditions
- Flock health evaluation to identify underlying causes
- Custom treatment plans for complex or resistant cases
Cost Considerations
Veterinary consultation typically costs $50-150 for initial evaluation, with additional charges for treatments or follow-up visits. While professional care improves outcomes for severe cases, the high success rate of early home treatment makes professional intervention unnecessary for most typical splayed leg cases.
Common Mistakes That Sabotage Treatment
Learning from others’ mistakes saves time and prevents treatment failures. The most common error is delayed intervention – waiting beyond the critical 48-72 hour window dramatically reduces success rates.
Treatment Application Mistakes
Over-tightening hobbles causes circulation problems and can create permanent damage. The hobble should allow slight movement while preventing leg splaying. Check for indentations on the legs after hobble removal – this indicates excessive tightness.
Using inappropriate materials like rubber bands or thin wire creates cutting and circulation hazards. Stretching elastic materials during application increases the risk of cutting off circulation as the material contracts.
Management Errors
Failing to provide appropriate flooring during treatment undermines the entire process. Even perfectly applied hobbles won’t work if the chick continues slipping on smooth surfaces.
Inconsistent hobble replacement allows treatment progress to reverse. Daily replacement is essential due to rapid chick growth and material stretching.
Environmental Factors
Keeping treated chicks with the main flock often leads to trampling and injury. Affected chicks need protected isolation until they can compete normally with their flockmates.
Inadequate food and water access during treatment causes additional stress and slows recovery. Position feed and water containers appropriately for chicks with limited mobility.
Follow-up Failures
Removing hobbles too early, before the chick maintains proper leg position independently, often results in relapse. Continue treatment until the chick walks normally for at least 24 hours without support.
Failing to address underlying causes means splayed legs will likely recur in future hatches. Successful treatment should trigger evaluation of incubation and brooding practices.
Frequently Asked Questions
1. Can splayed legs in chicks fix themselves without treatment?
No, splayed legs in chicks will not fix themselves without intervention. The abnormal leg positioning prevents normal muscle development from occurring, and the condition typically worsens over time without treatment. The longer treatment is delayed, the lower the success rate becomes. Chicks older than 72 hours show significantly reduced recovery rates even with proper treatment.
2. What’s the difference between splayed legs and curled toes in chicks?
Splayed legs involve the entire leg extending sideways from the hip, while curled toes specifically affect just the toes, which curl under the foot. Curled toes are typically caused by riboflavin (vitamin B2) deficiency and require different treatment using cardboard “sandals” taped to the feet. Both conditions can occur simultaneously and need separate treatment approaches.
3. Is it too late to treat splayed legs in older chicks?
Treatment success rates drop significantly after 72 hours, but some improvement is possible in chicks up to one week old. Older chicks require longer treatment periods and may not achieve complete recovery. However, even partial improvement can mean the difference between euthanasia and a functional life, so treatment attempts are worthwhile even in older chicks.
4. How tight should the hobble be on my chick?
The hobble should be snug enough to prevent leg splaying but loose enough to allow normal walking movement. You should be able to slip a finger underneath the hobble material, and there should be no indentations on the chick’s legs after removal. If the chick cannot walk at all with the hobble applied, it’s too tight.
5. Will my chick with treated splayed legs grow normally and be productive?
Yes, successfully treated chicks typically develop completely normally with no long-term effects on growth, egg production, or breeding ability. The vast majority of chicks treated within the first 48 hours show no lasting limitations. Even chicks with partial recovery often live productive lives, though they may not be suitable for breeding programs.